Tuesday, 29 April 2014

Recycle and redecorate

I needed a box to store a set of acrylic paints so had a look around the house to see what I could use. This is what I found:


The taps had long since been fitted but I kept the box because I was sure that one day I would use it.


That day had just arrived! It was exactly the right size for the tubes of acrylic paints.


I went round all the edges with Copic marker W7
and then covered the box inside and out with papers from the Docrafts Papermania capsule collection by Jesse Edwards.


Finally I sealed everything with a coat of matte decoupage glue.


The paints enjoying their new home!
 

Wednesday, 23 April 2014

Be Happy

I was making a card background for my entry into Crafter's Companion's Floral Challenge at their Facebook page and decided to use a quotation for the focal point. Looking through some rub-ons that I have had for quite some time (a few years actually) I found this one:


The embossed background was created using Sheena Douglass' Water Lilies A4 embossing folder from the A Little Bit Oriental range and makes me think of the lotus flower, which in turn made me want to choose a quotation that reflects inner peace or spirituality.

I mounted the embossed background onto some glossy black card and was going to attach the finished panel to the front of a 6"x6" card but as I looked at it and tried to imagine who I would send it to I decided that it would make a good piece of wall art. An 8"x8" frame and some papers from the A Little Bit Oriental range and this is what I ended up with:


The frame had already been painted blue for a different project. I thought of painting it black but then realised that I don't actually have any black paint! The blue that is visible on the inside of the frame matches the blue of the koi carp paper that the panel is backed onto so it's not too bad....

Having cut the floral paper and stuck it to the frame I gave everything a good coat of Spray and Shine. The main panel was stuck to the backing paper with Stick and Spray so that it can be removed and replaced with panels using images from the A Little Bit Oriental stamp range. I'm thinking of doing one panel using the koi carp and another using the tree.

So here it is, my entry into April's Floral Challenge over at Crafter's Companion's Facebook page. The challenge is open until 30th April so there's still time to enter.

Tuesday, 15 April 2014

Metallic effect decorated box

When Sheena Douglass brought out her Oriental Birds embossing folder as part of the A Little Bit Oriental range one of the samples was a decorated wooden box. It looked absolutely fantastic so when I won the embossing folder recently I really wanted to have a go at decorating a box.

I didn't have a wooden box so I used a cardboard mâché one. The sample appeared to use black cardboard with the embossing folder. The embossed panels were then gilded with silver gilding wax. I didn't have black card or gilding wax so did it all slightly differently...

Here is my box.


I cut three pieces of white centura pearl card to 5"x7" and embossed them using the Oriental Birds embossing folder then I coated them with 2 layers of Black Soot distress ink. I covered the edges of the box with black soot and painted the inside of the box silver.


Having cut the panels, glued them to the box and left it to dry I then gave everything a final coat of Black Soot distress ink. Once dry I gave everything a liberal spray of Spray and Shine to seal the ink and glued edges.

The final effect in real life is of a metallic charcoal. The box lid is a bit tight because of the added thickness to the walls of the box but it can still be put on and removed.

It may be nothing like the original it was inspired by but that's half the fun of creating!

Monday, 7 April 2014

Using Sheena Douglass A4 embossing folders in the Grand Calibur


Last week I had a lovely surprise. This delivery from Crafter's companion!


It was a fantastic giveaway from Crafter's Inspiration issue 3 and I couldn't wait to use it - only one problem: the A4 embossing folders wouldn't fit in my Grand Calibur!


The reason was that the version of the Grand Calibur that I have has sides to its pull out feeder tray so that a sheet of A4 card etc just fits and there are side tabs on the Sheena embossing folders that make the A4 folders wider than A4.


Fortunately I vaguely remembered Sheena saying on Create and Craft that the tray could be removed so that the folders could be used. I looked for instructions and found that Create and Craft themselves provide instructions for the removal of the tray. Their newer machines with their own brand name on them don't have this problem as the new style of feeder tray does not have the sides to it.


I clamped the machine to a small table using the suction pad and pulled...and pulled...and pulled... The machine spun round on the table but the tray would not come out. Eventually my fingers hurt too much to tug any more so I got a screwdriver and levered each side slightly inwards (placing the screwdriver in the gap between the machine and the tray side). Yay! The tray was now out and neither the tray nor the machine were damaged in the process!


You might just be able to see on the right that the tab on the embossing folder is just resting on the left side of the feeder tray.


The A4 Sheena embossing folders now fit..

...and emboss!

Sunday, 6 April 2014

Debbi Moore Easter Challenge

Debbi Moore Designs are running an Easter themed challenge over at http://debbimooredesigns.blogspot.co.uk. Entries can be accepted up until 18th April so there is still plenty of time to enter.

My entry is a (sort of) egg shaped gatefold card, which I made using the free papers that came with issue 8 of  'Bringing Inspiration to you' magazine.


Monday, 31 March 2014

Monochromatic challenge

I was just thinking that it was too late to come up with an entry for the monochromatic themed challenge over at Crafter's Companion when I remembered this notebook that I made a few weeks ago, using an image from the Frou Frou range. There's still a few hours left so check out the challenge at crafters companion monochromatic challenge


Sunday, 16 February 2014

Clean and Simple

Here is a notebook that I have made using the Bind-it-All and an image taken from the Crafter's Companion Appley Dapply's Nursery Rhymes by Beatrix Potter CD. I am entering it into this month's Crafter's Companion challenge, which is for any project made using the clean and simple (CAS) style.

The notebook was made using two pieces of  7"x9" card covered with white pearlescent paper. I printed the wording for the front cover onto pearlescent white paper before covering it and then sprayed both covers with Crafter's Companion Spray and Shine.

I used the image of Appley Dapply from the découpage section of the CD to decorate the front cover, going round the outside of the base image with a Spectrum Noir pen (BT1) before cutting it out.


I want to be able to use my notebook so I stuck each layer using extra strong double-sided tape. This way the image isn't too bulky and won't lift up or get bent while still giving me a good 3D effect. To help protect it I also sprayed each layer with Spray and Shine.

Monday, 10 February 2014

Debbi Moore Designs challenge entry

I'm getting into making notebooks this year and am entering this one into Debbi Moore Designs' very first challenge. The theme of the challenge is Love and it runs until midnight on 14th February. You can see the entries so far and enter here.


I made the A5 notebook using the Bind-it-All and decorated it using papers and elements from Debbi Moore's Vintage Birds CD, finishing it off with gems and glossy accents.

The cage that the bird is in has been raised on 3D foam but stuck down firmly round the edges. I wanted it to be slightly domed but also to not have loose items that could get bent or ripped when the notebook is used or stashed away in my bag.

The plaque reads: 'Love can always set you free' and I toyed with the idea of having the cage door open but decided that it could get easily damaged that way as the notebook is going to be frequently handled.

Perhaps I'll do a framed picture version and have the cage door open....


Papermill Valentine challenge

I've decided that one way to make sure I post more regularly is to start taking part in some crafty challenges. My first this year is the valentines themed challenge over at Papermill Direct. All you need to do is post a card or other papercraft project online and you could win a year's subscription to Simply Cards and Papercraft. Voting is done online and you can vote for your 5 favourites. Check out the entries here.

Voting has already started and continues until Thursday 13th Feb.

Here is my entry. I don't usually do plays on words but couldn't resist it this time once I had chosen the bee stamp. I originally bought this stamp in memory of a friend who used to keep bees so it's very special to me.

Monday, 16 December 2013

Christmas crackers

I love the idea of making my own crackers, complete with personalised gifts, but after a few unsuccessful attempts years ago it seemed like one of those good ideas that should remain just that - an idea. Then along came Cartridge Save ...

They have provided some instructions and ideas for handmade Christmas decorations and crackers on their website www.cartridgesave.co.uk/christmas and have been running a Christmas cracker competition so I thought I'd take the plunge and have one more go!

This is what I needed to get started.


I printed off the instructions, asked family to start collecting toilet roll tubes, made a bracelet, made a poinsettia decoration, tracked down some unused hats and jokes and ordered some cracker snaps. Finally, I needed some double-sided tape, ribbon and 3D foam to put it all together.
 
 
 Once I had everything ready I could get start making the cracker.

The first step is to take 2 toilet roll tubes and cut one in half. Cut the wrapping paper to approximately 20cm x 30cm. I used quite wide toilet roll tubes but if you use skinny ones the short side of the paper will need to be less than 20cm. Allow enough to go round the toilet roll once with a couple of centimetres overlap.
Score 10cm in from each end of the long side of the paper and also lightly score 7cm in from each end.
Lay the snap along the long side of the paper near the top and secure with glue or strong double-sided tape at each end. It needs to be stuck firmly enough at both ends to be forced to pull apart at the centre and not just come loose at one end when the cracker is pulled.
I then used double-sided tape to stick the paper to the toilet roll tubes, keeping the gaps between the tubes glue-free. I tried placing the tubes along the bottom edge of the paper and also in the middle. Both worked but I personally found it easier to keep the cracker straight when I started with the tubes in the centre. I also placed the hat and joke inside the central tube before rolling the paper.

Once the paper was rolled I stuck down the overlap using double-sided tape, twisted one end of the cracker (made easier by previously scoring 7cm from the end) and tied it with a ribbon. By tying the ribbon in a bow it can be saved and used again for next year's crackers.

I filled the cracker, twisted and sealed the other end and could have left it there. The wrapping paper is so elegant the cracker didn't really need decorating.


Just for something extra I layered up a poinsettia that I had stamped 3 times onto red card and gave it golden highlights. I then stuck the poinsettia to a 3cm x 21cm strip of green card, wrapped it round the centre of the cracker and stuck the green strip together to make a removable ring.

Once the cracker has been pulled the poinsettia decoration can be used as a serviette ring or saved for next year's crackers.
There's always someone who doesn't wear their party hat so any unused hats as well as the jokes, ribbons and poinsettias can be put in a box ready for next year's makes. With the gifts having been chosen with the recipients in mind it's unlikely that they can be saved for next year but that leaves a good excuse to make some more!

Will I be making more crackers in the future? Yes. Getting the toilet roll tubes to line up and roll neatly was a bit fiddly at first but it got easier with practice. The crackers themselves were inexpensive to make and some of the elements can be re-used, making them even cheaper and more environmentally friendly. The wider tubes that I used could hold quite a big present that I knew would actually be wanted and - best of all - there was a very satisfying bang when the crackers were pulled!

So thank you Cartridge Save for encouraging me to have one more go at making my own crackers. I still have lots of snaps so I could be making crackers for New Year, birthdays, weddings, anniversaries ...

Wednesday, 2 March 2011

Chocolate Baroque

Glenda Waterworth has started new stamp company Chocolate Baroque and to celebrate is offering a free download from the Chocolate Baroque Design Team blog

I saw the large, ethereal flower on the paper and immediately pictured a fairy sitting in it or dancing lightly over its surface. I imagined the fairy daring me to dream and wonder and so turned to my Elusive Images Artistic Affirmations stamp set for the wording. The fairy is from a Flower Fairy découpage sheet.

The card was waiting to be finished when my copy of  April's edition of Craft Stamper arrived. The free stamp was a beautiful butterfly stamp from Chocolate Baroque and it was just perfect. So here is the card, which will probably end up as a framed piece rather than an actual card.

I covered an 8" square card blank with a pale lilac mottled paper and edged it with Brilliance Pearlescent Lavender ink. I stamped 2 butterflies onto heat resistant acetate using Brilliance Pearlescent Lavender ink then sprinkled Stardust embossing powder over them and heat embossed the images.

I cut out the Flower Fairy découpage layers and placed the bottom layer on the large flower where I wanted her to sit. I then marked the sections at her feet and knees where I would need to begin and end a slit fer her to sit behind the front petal. Once I had removed her and cut round the petal between the marked points I could sit her back in, add the remaining layers one by one and draw round the petal so that the layers could be cut to shape and the finished Flower Fairy could sit neatly in the flower and dream away!

I cut a section of the free downloaded paper, incorporating most of the large flower, edged it with Bundled Sage Distress Ink and mounted it onto a larger piece of purple Bazzill, slipping the découpaged Flower Fairy into the slit.

 The word panel was made by cutting a square of the mottled purple background paper and gluing it to a piece of card. I then added patches of Bundled Sage Distress Ink to the square before cutting it using a die from the Nestabilities Labels 1 set and running the Bundled Sage ink around the edge. I cut a larger label from the purple Bazzill and embossed the edge with Stardust EP. I stamped the words using a mixture of Brilliance Pearlescent Lavender ink and Versamagic Purple Hydrangea ink. When the panels were dry I mounted the words panel onto the purple panel and attached them to the card with 3D foam.

I then cut out the acetate butterflies, cruelly bent their wings and glued them to the card using pinflair glue. While they were drying I added a combination of Lavender and Frosted Lace Stickles to the flower and went over the stamens with a London Fog Memento marker. Finally, I added some irridescent shimmer drops. If I had had them in a lilac shade they probably would have stood out more clearly ... something else to add to my list of things to get ...
Now I'm looking at the 'finished' article and remembering that 8" square wooden frame I saw a few months ago ...

If you like this card/picture please go to the Chocolate Baroque Design Team blog where you can download the paper and generally see lots of inspiring work.

Thanks for stopping by,

Liz

Sunday, 30 January 2011

Seahorse easel card

I treated myself to some gorgeous Elusive Images stamps just before Christmas and made this card recently for my mum's birthday using the seahorse from the Mermaid Queen set. The easel card itself was created using the new Spellbinders Calibur and the Grand Labels 1 and is just under 7" square. I covered the card blank using papers from the Artylicious Essence of Nature CD and stamped and mounted two seashells to prop up the card front.

I stamped the image of the seahorse clinging to its piece of seaweed five times, masking some of the seahorses to create a little group. There is an error that I hadn't noticed at the time so a corrected version may soon have to appear!


Once I had stamped the five seahorses (using versafine ink) I then coloured in the seahorses using Derwent Inktense pencils. Once my seahorses were finished I could see my way round the seaweed a bit better and coloured them in using greens and a little bit of sepia. The pebbles were coloured using a brown and grey. Finally I filled in the background with a light wash for the sand and water. 


Once the panel had dried I mounted it onto a slightly larger piece of blue card and attached the completed panel centrally to the front of the easel card. I finished the card by adding a panel with 'Happy Birthday' stamped onto it (also from Elusive Images).


Sunday, 26 September 2010

Beatrix Potter

Hands up if you love the Beatrix Potter stories. Those little books that are just so easy to hold, with the beautiful illustrations and magical stories ... ? Of course there was so much more to Beatrix Potter herself. Such a strong and remarkable woman.

This card has been made using papers printed from the Beatrix Potter The Tale of Two Bad Mice CD-rom from Crafter's Companion. I haven't done any stamping on this card which is very unusual for me, but when the originals were so beautiful and delicate why mess with them?


Sunday, 15 August 2010

A bit of magic on a dreary day!

I was thinking of taking a photo of my craft desk on Wednesday, took one look at it and thought 'not this week!' Anyway, I'd stamped this little unicorn a while ago and it had been waiting for a home. I had printed off some papers from the Artylicious Essence of Nature CD but they weren't quite what I wanted. Well, as I cleared my desk I unearthed this lovely paper from the Graphicus Guild paper pack and the unicorn just had to canter onto it!

The card is A5 and edged with Oasis Green Versamagic ink, then covered with the GG paper. The stamp is from the Elusive Images Loving Sentiments set and the unicorn is also Elusive Images (Unicorns). I stamped the unicorn onto white pearl card, cut it out and then hilighted the mane and tail with Frosted Lace stickles. The hooves and horn have simply had some glossy accents added. I then mounted the unicorn using 3D foam.


I hope you like this card. It's simple, but makes me think of the magic of a new day that hangs in the air in the early morning. Whatever you're doing today, make it beautiful!

Tuesday, 3 August 2010

Hello and Welcome!

Hello to everybody who has found this blog. I have been making cards (mainly) for a couple of years now and have become pretty addicted to inking and stamping and generally getting creative. I blame a lot of that on the Graphicus Guild, so if you're not already a member click on the logo and check it out!

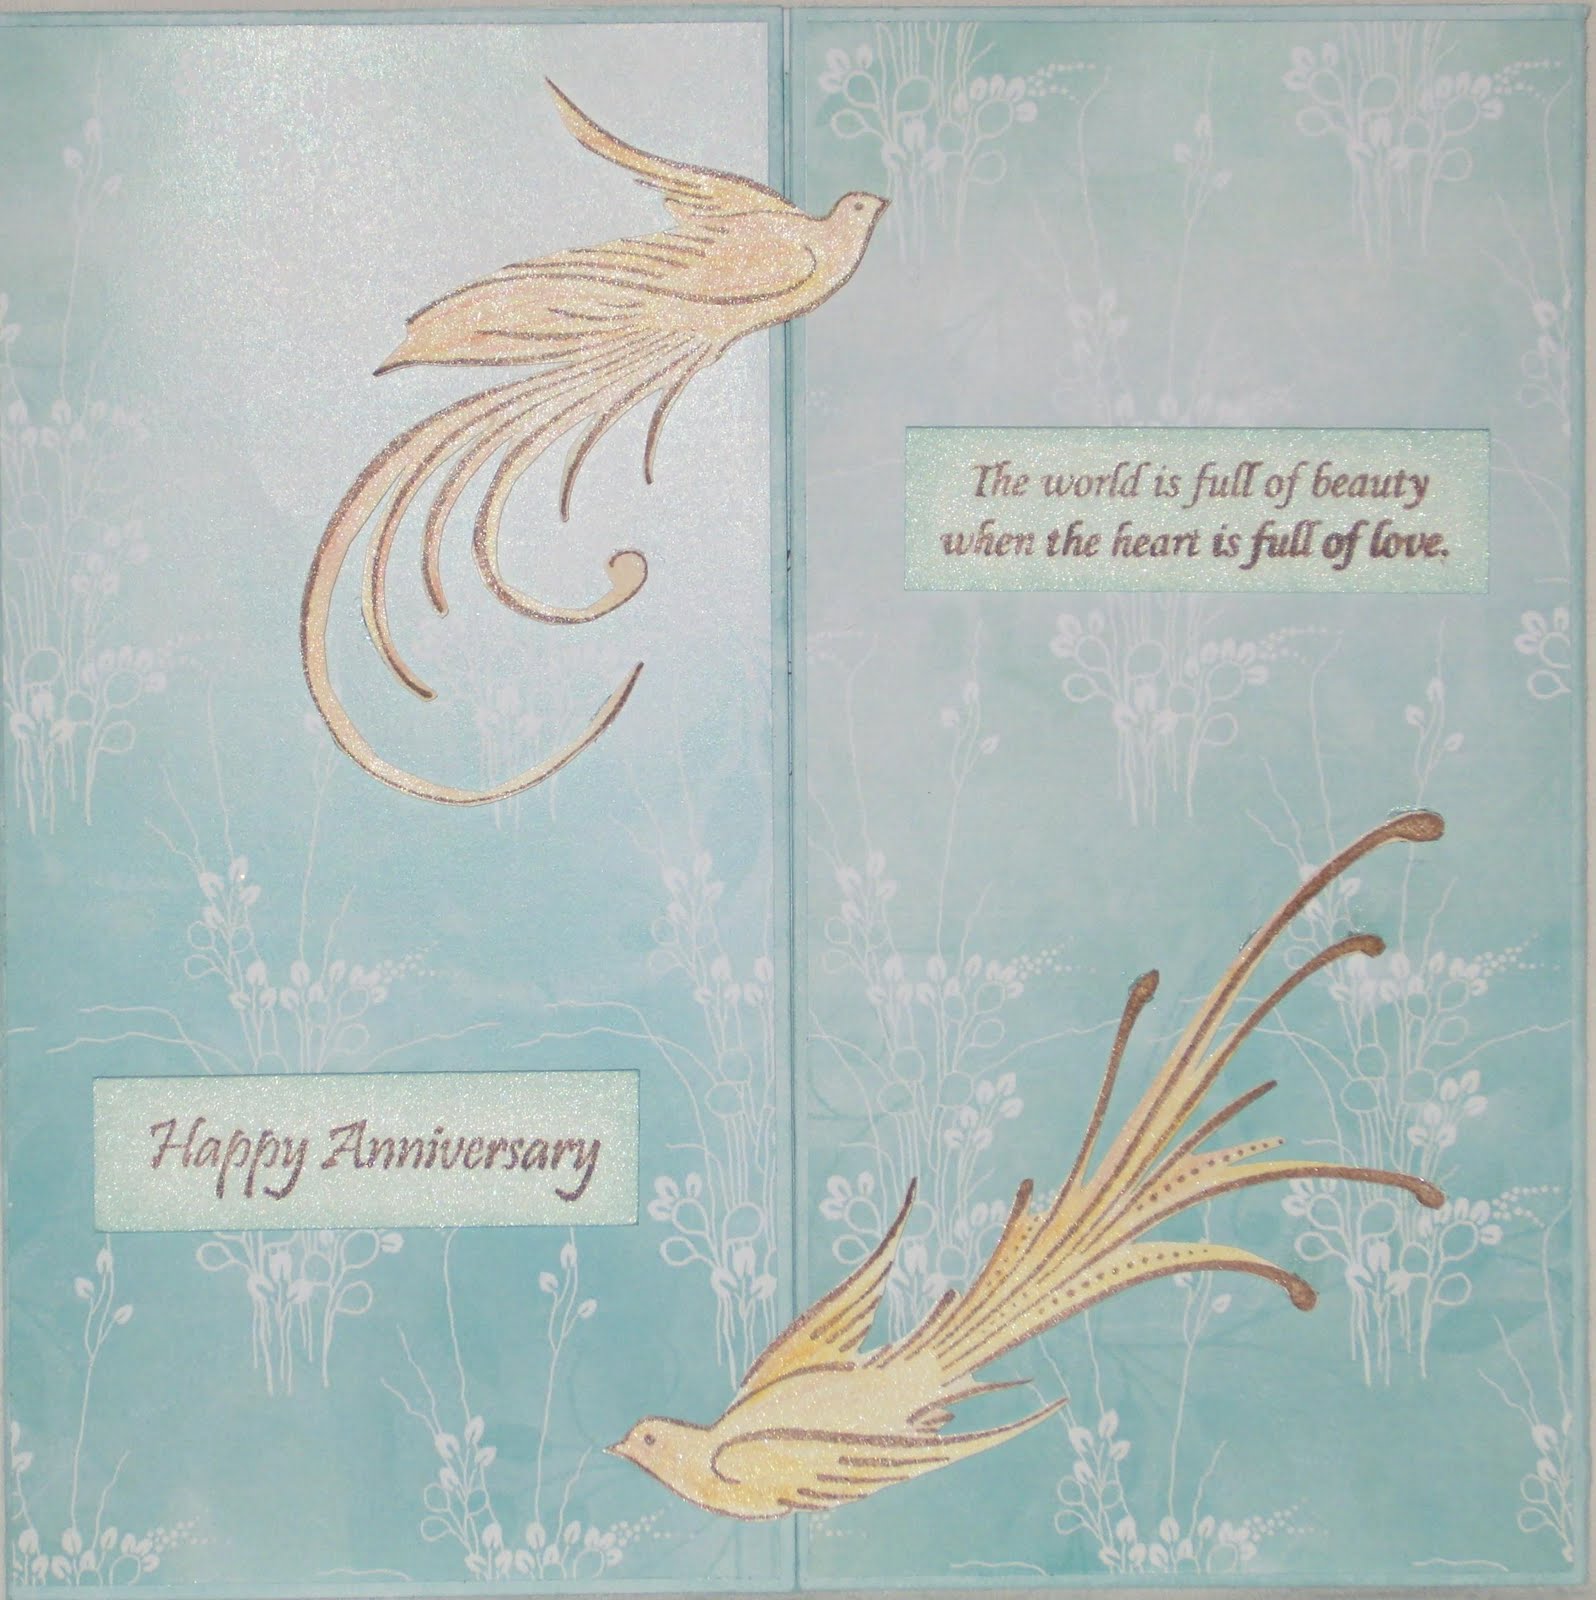
The photo below is of an anniversary card that I made recently for my sister and brother-in-law. It's an 8x8 gatefold card using one of the papers from the latest Artylicious CDs (Essence of Nature) and stamps from Elusive Images and Lavinia Stamps. The inside, which I haven't shown here, was inked all over with Adirondack Aqua and then a random pattern of leaves was stamped, again using the Adirondack Aqua pad. I then used the computer to create a message panel with the wording in a chocolate brown and the panel filled with a light aqua.